

Korean build guide with Western core names · About these guides
The Korean source highlights the 333 Rapid Shot Loyal Companion Sharpshooter build for its fast firing rhythm and sustained skill uptime. Its actual performance depends on your gear, unlocked effects, and ability to manage two buffs.
This Loyal Companion setup combines three Rapid Shot Ark Grid cores. Other normal skills build stacks, which then fund repeated empowered Rapid Shots.
The Three-Core Setup
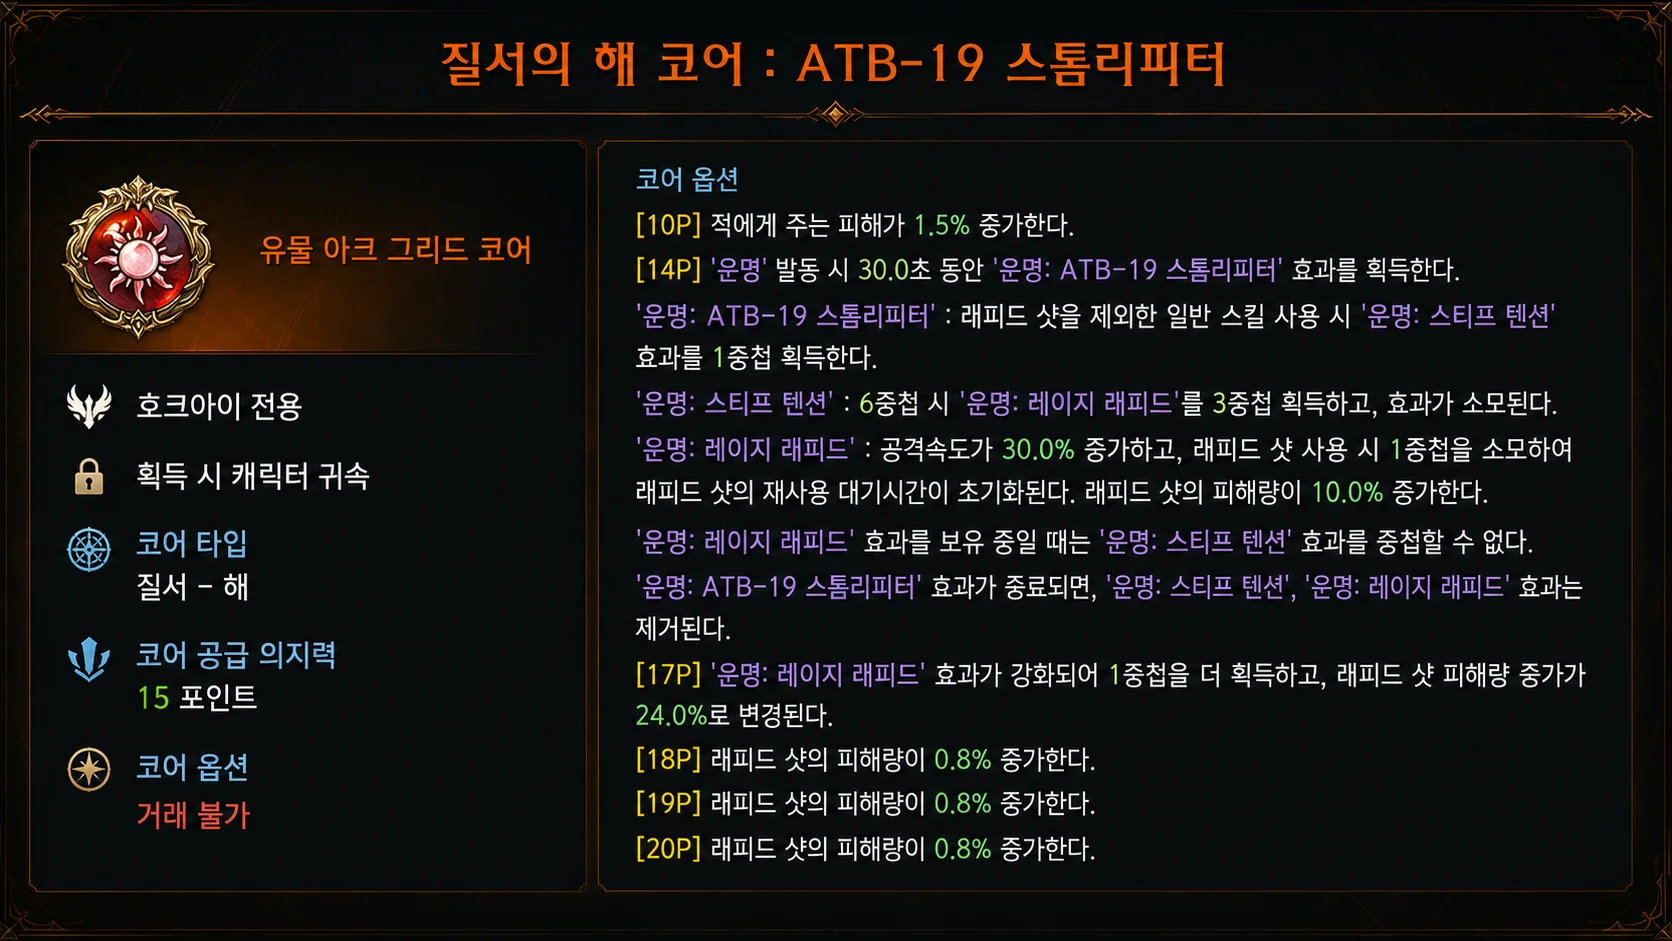
In this guide, “333” means the source’s third Sun, Moon, and Star core choices. It is not an engraving configuration or a universal preset code.
| Slot | Ark Grid Core | Main Function |
|---|---|---|
| Sun, third choice | ATB-19 Rapidfire | Builds stacks with normal skills to enable empowered Rapid Shots. |
| Moon, third choice | HSU-37 Rapid Fire Support | Improves Rapid Shot damage and, at the relevant breakpoint, reduces its MP cost and grants Paralysis Immunity. |
| Star, third choice | HSU-22 Limb Stabilizer | Adds Rapid Shot damage and modifies its execution through the core’s unlocked effects. |
All three focus on Rapid Shot. Check the actual Core Point breakpoints and grade on each core; simply equipping the names does not unlock every effect described here.
How the Stack Engine Works
Building Max Tension
While the appropriate ATB-19 effect is active, normal skills other than Rapid Shot grant stacks of Destiny: Max Tension, one per qualifying use.
At six Max Tension stacks, those stacks are consumed to grant Destiny: Rapid Rage. The base grant is three stacks; the relevant 17-point effect raises it to four. The Western September update also removed the old restriction on building Max Tension while Rapid Rage remains active.
Rapid Rage enables the following effects, subject to the core’s unlocked breakpoints:
- 30% increased attack speed.
- Additional Rapid Shot damage.
- Rapid Shot cooldown resets when used under the effect.
- Each Rapid Shot consumes one Rapid Rage stack.
With the four-stack effect unlocked, you can fire up to four empowered Rapid Shots in succession.
Keeping One Rapid Rage Stack
You do not always need to spend every empowered shot immediately.
Keeping one Rapid Rage stack can preserve the attack-speed benefit while you build five Max Tension stacks with other normal skills. This approach relies on the updated effect allowing both buffs to coexist.
Use the last empowered Rapid Shot, then a sixth qualifying normal skill to trigger the next refill. Watch the actual buff timer and available cooldowns.
Four Rapid Rage stacks → spend three Rapid Shots → use five other normal skills → spend the last Rapid Shot → use a sixth normal skill → refill Rapid Rage.
Allocating Combat Stats

Start with the effective Crit rate required by your chosen build, then compare Swiftness and Specialization for the remaining allocation.
For a Blunt Thorn setup without Adrenaline, include all applicable sources:
- Crit rate from your character stats.
- Master Elixir’s Crit bonus, if that system and effect apply to your setup.
- Rapid Shot’s relevant Crit Tripod, described as the companion option in the Korean source.
- Bracelet and ring Crit-rate effects.
- Party Crit synergy.
Once your Crit target is covered, Swiftness can improve normal-skill and Hyper Awakening Technique cooldowns.
Specialization also affects Silverhawk damage, so it is not automatically useless here. Compare Crit/Swiftness and Crit/Specialization using your gear, engraving choices, and actual uptime.
Engraving Choices
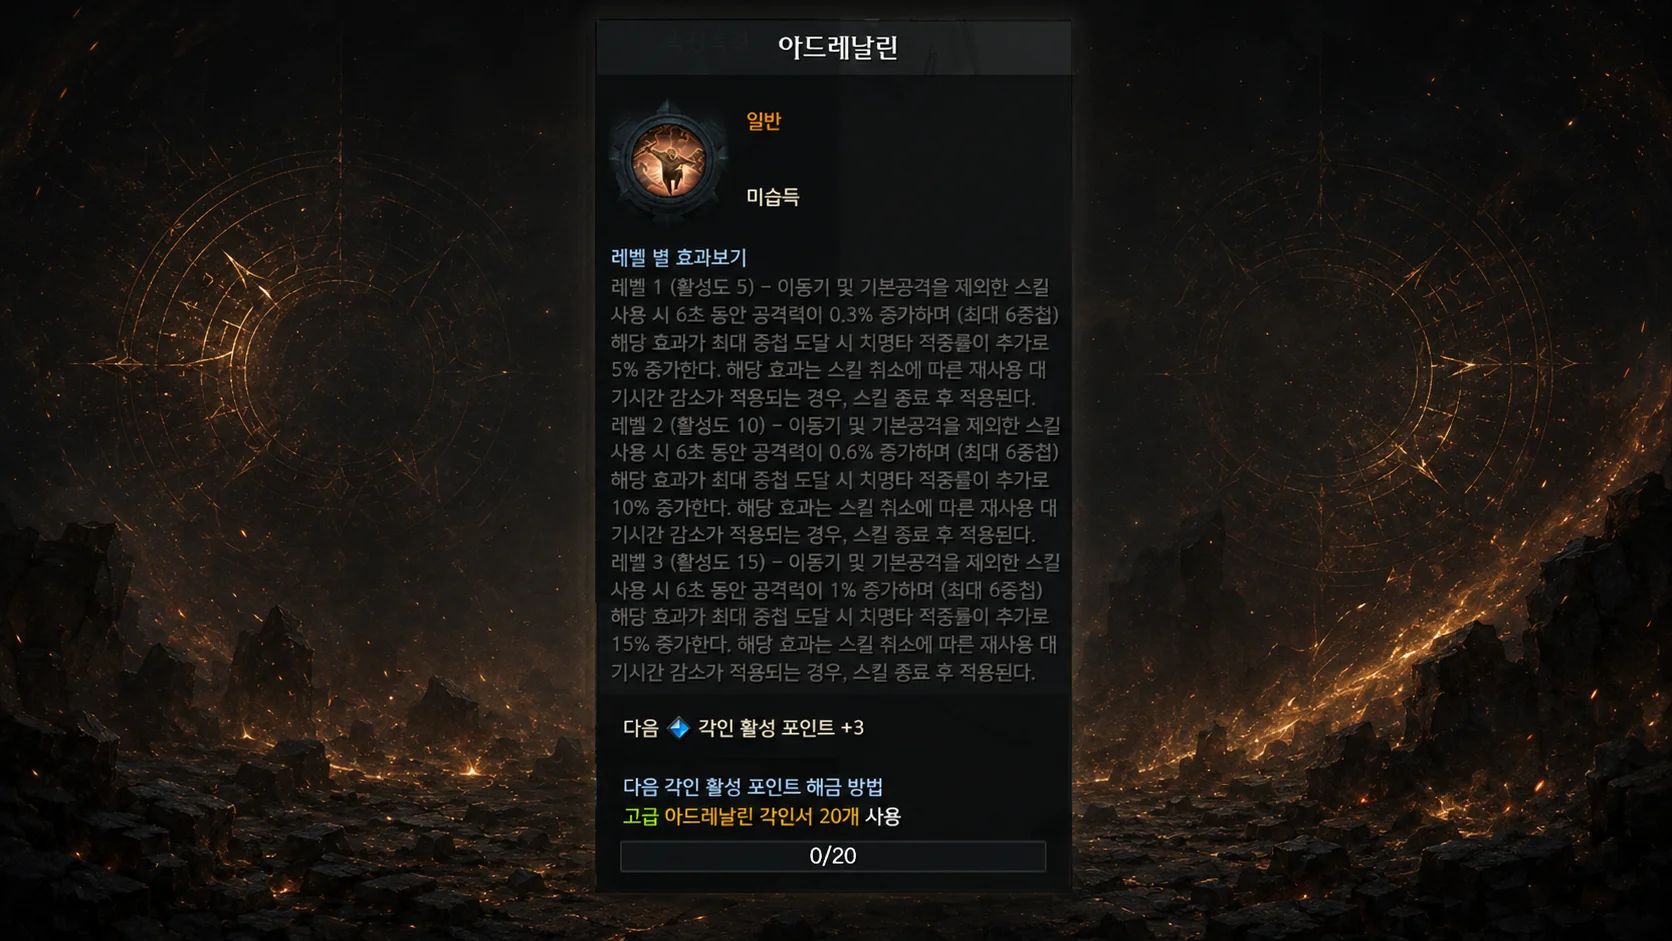
One variant highlighted by the source is Blunt Thorn without Adrenaline. It trades Adrenaline’s stack management for other damage engravings, relying on the rest of the setup to supply enough effective Crit.
Why Consider Dropping Adrenaline?
- Less engraving-stack upkeep.
- Less need to build Adrenaline before an opening burst.
- Makes use of the build’s available Crit sources.
- Leaves more attention for Ark Grid buff management.
What to Check First
Insufficient Crit can weaken this variant. Blunt Thorn also converts excess Crit under its own rules, so “anything above 100% is wasted” is not a valid blanket rule. Calculate against its current tooltip, conversion limit, and party synergy.
An Adrenaline variant may fit your existing stone, books, or Crit budget better. Compare complete builds rather than replacing one engraving in isolation.
Typical Skills
The source uses these skills:
- Rapid Shot
- Snipe
- Hawk Shot
- Charged Shot
- Sharp Shooter
- Atomic Arrow
- Moving Slash
- Shadow Arrow
Normal skills other than Rapid Shot deal damage while building Max Tension when the required effect is active.
Shorter-cooldown skills help refill stacks. Reserve Moving Slash when you need a way out of the next mechanic; spending your mobility for one more stack can cost far more uptime than it gains.
Choosing a Hyper Awakening Technique
The source compares Lock-On and Spiral Arrow as Hyper Awakening Techniques, rather than Awakening ultimates.
Consider Lock-On When:
- The boss moves frequently.
- Reliable hits matter more than an ideal stationary sequence.
- You need flexible positioning.
- You want a more convenient technique window.
Consider Spiral Arrow When:
- The boss remains still for a long window.
- You can reliably land its full sequence.
- Your group is planning damage around a suitable burst window.
These are encounter-based preferences from the source, not a universal damage ranking. Test the option you can consistently land.
Skill Gem Priorities
Because Rapid Shot is the build’s focus, compare its damage gem first. Actual priorities should follow your damage distribution and currently equipped gem levels.
Source Damage-Gem Priority
- Rapid Shot
- Snipe
- Hawk Shot
- Sharp Shooter
- Charged Shot
- Silverhawk, where the matching gem effect applies to your setup.
Source Cooldown-Gem Priority
- Rapid Shot
- Hawk Shot
- Snipe
- Sharp Shooter
- Shadow Arrow or your selected normal skill.
Rapid Shot cooldown reduction can matter outside the reset loop and during recovery. Its resets do not, by themselves, prove a cooldown gem is your best purchase; compare whether another skill’s cooldown is limiting your actual refill cycle.
Opening the Fight
If the encounter allows pre-stacking and the active buff persists into combat, preparing Max Tension can bring the first empowered sequence forward.
Use this corrected opening outline:
Atomic Arrow → Lock-On or Spiral Arrow as appropriate → reach six qualifying normal-skill stacks → spend up to four empowered Rapid Shots → rebuild six Max Tension stacks before the next refill. A single Shadow Arrow does not independently grant another full sequence.
If four valid Max Tension stacks survive your preparation, two more qualifying normal skills complete the first refill. Verify your buff display rather than assuming stacks carried over.
Organizing the Repeat Cycle
The source groups skills as follows:
- Group A: Snipe and Hawk Shot.
- Group B: Charged Shot and Sharp Shooter.
- Stack builders: Atomic Arrow, Moving Slash, and Shadow Arrow.
- Main empowered skill: Rapid Shot.
- Hyper Awakening Technique: Lock-On or Spiral Arrow.
Alternate available damage skills and fill the gaps with shorter-cooldown normal skills. Use Rapid Shot around the stacks you actually have.
Track these two counts instead of forcing a rigid sequence through every boss mechanic:
- How many Rapid Rage stacks remain?
- How many Max Tension stacks have you built?
Practical Rotation Tips
Do Not Automatically Empty Rapid Rage
Spending all four can remove the attack-speed benefit during rebuilding. Keeping one may connect your cycles more smoothly, while a short burst opportunity may justify spending everything.
Maintain the Required Destiny Effects
The source activates HSU-37 through Wings of Storm. Check your core’s live activation condition and Silverhawk state. If the relevant Destiny effects expire, the stack engine can collapse; refresh them before relying on another sequence.
Keep Moving Slash for Dangerous Mechanics
Moving Slash can contribute a stack, but it is also a movement tool. In an unfamiliar raid, keeping it available may be the better choice.
Make Both Buffs Easy to Read
Place the relevant buff displays where you can track them. This reduces accidental overspending and helps you notice missing activations before the rotation stalls.
Strengths and Tradeoffs
Potential Strengths
- Fast, repeated Rapid Shot sequences.
- Sustained ranged damage opportunities.
- Strong main-skill uptime when you manage the loop well.
- An active rhythm built around short cooldowns.
- Less engraving-stack management in the no-Adrenaline variant.
Tradeoffs
- Requires all three matching cores and the needed breakpoints.
- Requires tracking two Ark Grid buffs.
- Frequent Rapid Shot inputs can feel busy.
- Interrupted cycles can delay the next empowered sequence.
- Crit allocation must match your own gear and build.