

Korean build analysis with corrected numerical claims · About these guides
This guide examines the Korean source’s Spatial Swordsman “333” setup: rift placement, Ark Grid effects, and charge management. Its claimed 92% damage gap is not established by the calculation provided.
The source describes a demanding build with a high theoretical ceiling, but supplies no reproducible test setup or representative raid measurements. Treat its comparisons as build commentary rather than a current class ranking.
What the Build Tries to Achieve
The source praises the build’s damage while criticizing the conditions needed to deliver it. Its comparison with Remaining Energy Deathblade is not independently demonstrated here.
The central tradeoff is maintaining the required rift and core effects while moving through an encounter. “333” is the source’s core-choice shorthand, not a transferable preset or a combat-engraving code.
The Interference Rift
The rift is part of this build’s damage and positional rules, rather than a demonstrated flat 92% tax on every attack.
Why Rift Placement Matters
-
Interpreting the Percentage Claim: The source claims a damage difference of 92%, citing 21% and 24% effects among its inputs. Those two factors alone multiply to 1.5004, about 50%, not 92%. Without the full stacking model and affected skills, the headline is not a valid total-DPS calculation.
-
Maintenance Cost: The source refreshes its rift on an approximately 20-second cycle and notes the cast commitment. Follow your actual passive, duration, charge, and core conditions rather than treating that historical timing as universal.
-
Positioning: The rift can provide Back Attack functionality under the active build’s rules. Read whether the effect already supplies the relevant classification or bonuses; do not assume the source’s insistence on standing behind the boss overrides the actual tooltip.
The Source’s 111, 222, and 333 Comparison
Code Source Description Source Relative Figure Source Difficulty Qualification 111 Lower-complexity option. 0.93–1.0. Lower. The source favors its comfort; the numerical comparison is not independently reproduced. 222 Time-focused option, described alongside the Time Wielder playstyle. 1.1. Moderate. This is not proof that it shares the same passive prerequisites or gear as the Spatial Swordsman setup. 333 Spatial-manipulation option. 1.2. Higher. The source values its ceiling while criticizing execution. The multiplier lacks a specified common baseline.
These figures are historical source estimates, not verified current build rankings. A more comfortable setup can perform better for a particular player, and a nominal ceiling does not establish real raid output.
Stats, Passives, and Engravings

Check the Whole Setup
-
The Source’s 1515 Swiftness Example: Raid Captain and Mass Increase need a complete speed comparison. The source also cites a fast-entry passive providing 10% attack speed. One additive bonus does not automatically erase every opportunity cost of Mass Increase; check effective speed, caps, and the full build.
-
Combat Engravings: Compare Grudge, Keen Blunt Weapon, Mass Increase, Raid Captain, and other compatible choices such as Adrenaline. Spatial Swordsman is a class-passive choice, not an extra sixth combat engraving. If using Adrenaline, maintain its required stacks.
-
Crit Calculation: The source’s 81–83% target is ambiguous. Do not add another 20% + 10% + 7% to that figure without checking what it already includes. Build a single effective-Crit total using current tooltips and applicable conditional bonuses.
MP and Cooldown Management
Rapid skill use can create MP pressure. Match Evolution, Enlightenment, and Leap choices to their actual functions rather than assuming every MP effect is in Leap. Where suitable, Conviction and Judgment can help under their proc rules; Focus runes may also be useful. Running out of MP is a constraint to solve, not proof that you played perfectly.
A Practical Rotation Framework
Watch the source’s spatial-cutting skill charges and the actual Destiny buff instead of forcing a sequence without its required effects.
Preparation Before Engagement
-
The Source’s 14–15 Preparatory Casts: It describes building a second-hand enhancement effect with casts before the pull. Verify the actual condition and whether stacks persist; that cast count is not a universal requirement.
-
Movement Skills: Only count a movement skill if the current effect actually treats it as a valid trigger. Confirm the displayed stacks before the pull.
-
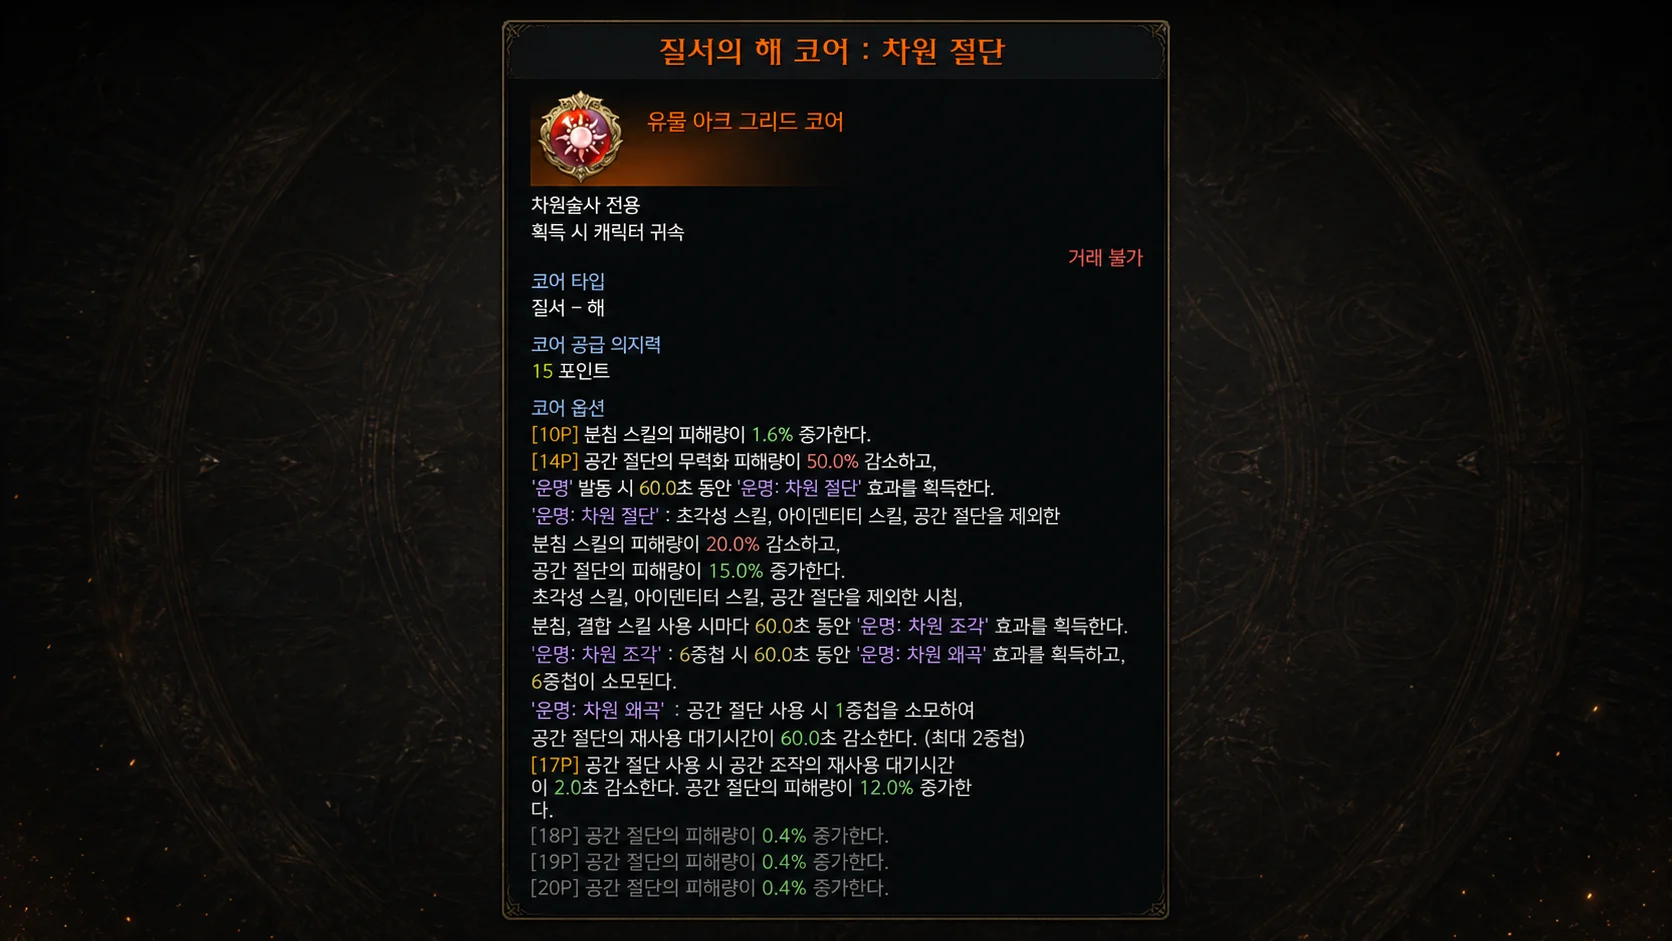
Destiny Activation: Use the appropriate condition to activate Destiny. The source describes a 60-second effect through its spatial-manipulation skill; check your selected core and live duration.
Charge Gain Is Not Always a Full Cooldown Reset
-
Important Distinction: The source describes its spatial-cutting skill gaining or being set to one charge after certain main skills. Read the exact effect rather than assuming it resets every charge and recharge timer.
-
Avoid Wasted Refills: If the effect sets a charge rather than adding freely above the cap, using the trigger while already full may waste value. Spend and refill according to the actual charge display and encounter window.
Source Rotation Outline
-
Opening Place the required rift → confirm Destiny → maintain Adrenaline if equipped.
-
Main-Skill Loop
-
Use the spatial-cutting skill when a charge is available.
-
Use the source’s prismatic-execution attack or cross-cut attack if it meets the current refill condition.
-
Use the spatial-cutting skill again after confirming the charge.
-
Use the forward-thrust attack or counterattack skill if its actual effect provides the next refill.
-
Repeat the spatial-cutting attack as resources and valid charges permit. These descriptive labels do not replace a verified Western skill preset.
-
-
Maintenance Refresh the rift and Destiny as required. Only pre-stack during mechanics when safe and valid; do not prioritize idle casts over assigned raid tasks.
-
Should I Avoid the 111 Setup Entirely?
-
No universal exclusion is justified. The source’s claimed gap does not establish an unbridgeable real-raid disadvantage. Compare complete builds under the same conditions and choose one you can execute reliably.
-
-
Must I Place the Rift Behind the Boss?
-
Follow the actual positional effect and the next mechanic. A rift may allow qualifying Back Attacks from another angle. Confirm what the active effect grants and choose a safe position; neither a front placement nor rear placement guarantees uninterrupted damage.
-
-
What If I Keep Running Out of MP?
-
Review the cause. Check skill frequency, applicable MP passives, Focus, Conviction/Judgment, and available party assistance. Solve the resource bottleneck instead of treating an empty MP bar as a performance badge.
-