
AION 2's Eracus Ruins is a Transcendence dungeon where when to enter and when to leave matters as much as finding a safe spot. Do not enter the first boss's pit too early. At the elephant-like final boss, clear the last shockwave even after avoiding the rotating floor. The gold offering often searched for under Kiriko mechanics is not complete when you pick up a coin: approach the boss and finish the interaction. This guide concerns the Korean version, with names rendered from Korean.
The guide focuses on patterns observed in Stage 2. It does not assume Stage 3's additional patterns or details are identical. While learning, prepare your next action between attacks rather than memorizing every attack at once.
Eracus Ruins entry requirements and reward limits
Eracus Ruins is a new Transcendence dungeon added on November 11. It requires character level 55, with Combat Power thresholds as follows.
| Difficulty | Character level | Required Combat Power |
|---|---|---|
| Stage 1 | 55 | 800.0K |
| Stage 2 | 55 | 1.000M |
| Stage 3 | 55 | 1.200M |
Stages 1–3 cost 80 Od Energy. Final-boss kills are limited to five weekly, replenishing Wednesday at 05:00 KST (UTC+9). Required Combat Power is an entry condition, not a guarantee you can ignore mechanics.
Special-reward acquisition counts are shared by characters on the same server. Distinguish that sharing rule from the final-boss kill limit. Running several characters does not provide a separate special-reward allowance for each.
Clear regular enemies as you progress. Think of finishing combat sections in sequence rather than bypassing everything to rush the bosses.
First boss: locate a pit, then wait for the entry cue
For the scorpion-shaped first boss, learn the outer-pit mechanic first. When dialogue tells you to grab hold of something and pits appear around the edge, locate and approach a nearby one. Avoid entering as soon as you find it.
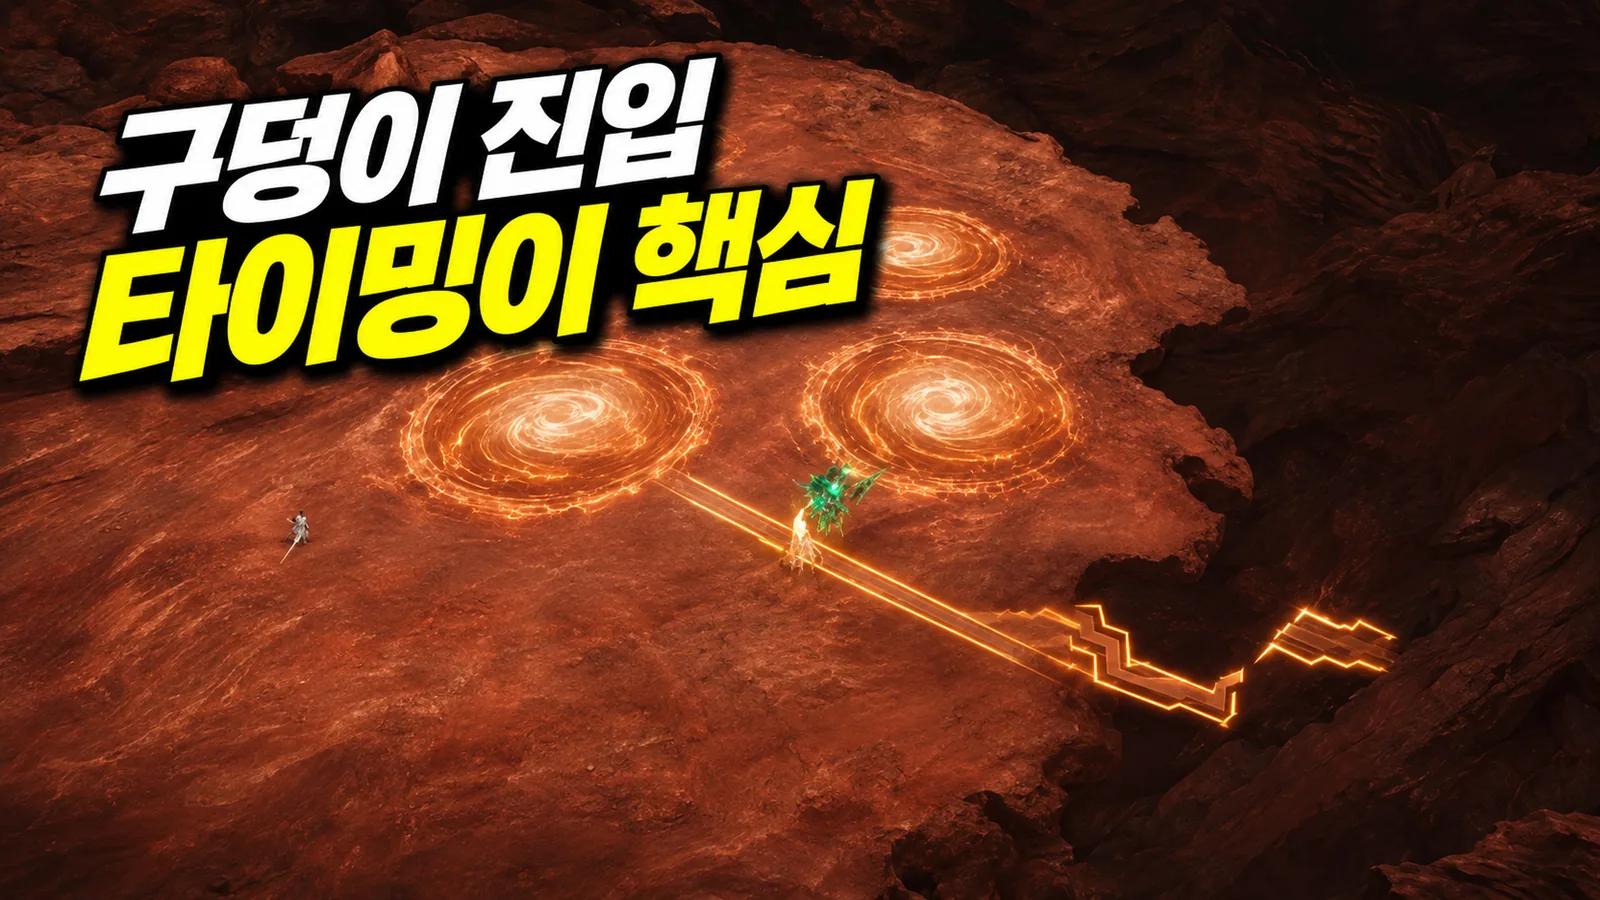
The Stage 2 guide uses roughly two seconds remaining on the central gauge as the entry cue. Rather than treating that as an exact universal timing window, learn the sequence: move beside a pit early, then enter late in the gauge. Starting the run late costs travel time; entering on arrival skips the waiting step.
The point to give up extra attacks is when you need to locate the pit. Look around and prepare to move when the dialogue appears, rather than noticing late and sprinting across the arena. Separate starting the movement from entering the pit.
For another major pattern announced by sandstorm dialogue, learn to gather with the group and attack. First distinguish the signal to move outward from the signal to group up. They should not produce the same movement.
Second boss: the sequence continues after the charges
The dragon-shaped second boss is easier to read as an attack sequence. Early on, ground attacks target individual positions three times. Keep movement space and watch your feet rather than standing still to attack immediately.
Watch the areas near the tank as well. Other players being caught can cause additional rotating ground attacks, so adjust spacing to avoid overlapping areas. Check the floor and nearby teammates rather than simply moving toward the tank.
Later, the arena shrinks. The boss charges its aggro target three times, uses a broad breath, then places multiple personal ground attacks. Remember three charges → breath → personal ground attacks.
Committing to a long animation immediately after the third charge makes the breath or floor follow-up harder to handle. Once the charges end, look at the boss for breath direction, then return your attention to your feet. Avoiding one attack does not end the whole sequence.
Jump over the spreading shockwave after a ground slam, sometimes called the jump-rope mechanic. It can stun you. Distinguish moving sideways out of a floor attack from jumping a wave. With less arena space, reading the next attack becomes more important.
Final boss: alternate attention between hands and floor
The final boss starts using hand slams early. Watch the left/right order, move to the side struck first, and prepare to block or evade. Avoid remaining in one place attacking while its hand sequence is still in progress.
Someone being hit by a circular slam can trigger a shockwave. If you are stunned when small triangular personal ground attacks overlap, damage can chain, especially without a stun break. Jumping the first wave helps preserve your ability to act more than squeezing in a little damage.
When four directional red circles and diagonal doughnut areas appear, enter the hollow center of a doughnut. Find a definite safe opening rather than a gap that merely looks wide between red circles. Multiple colors and shapes can still be reduced to one movement target.
When sandstorms pass on both sides and the boss raises both hands overhead, heavy attacks follow on its left and right. Align in front of or behind it. Although this is still close-range fighting, the safe direction differs from the earlier hand attacks. Read the raised hands and passing sandstorms together.
Follow the safe rotating wedge, then jump at the end
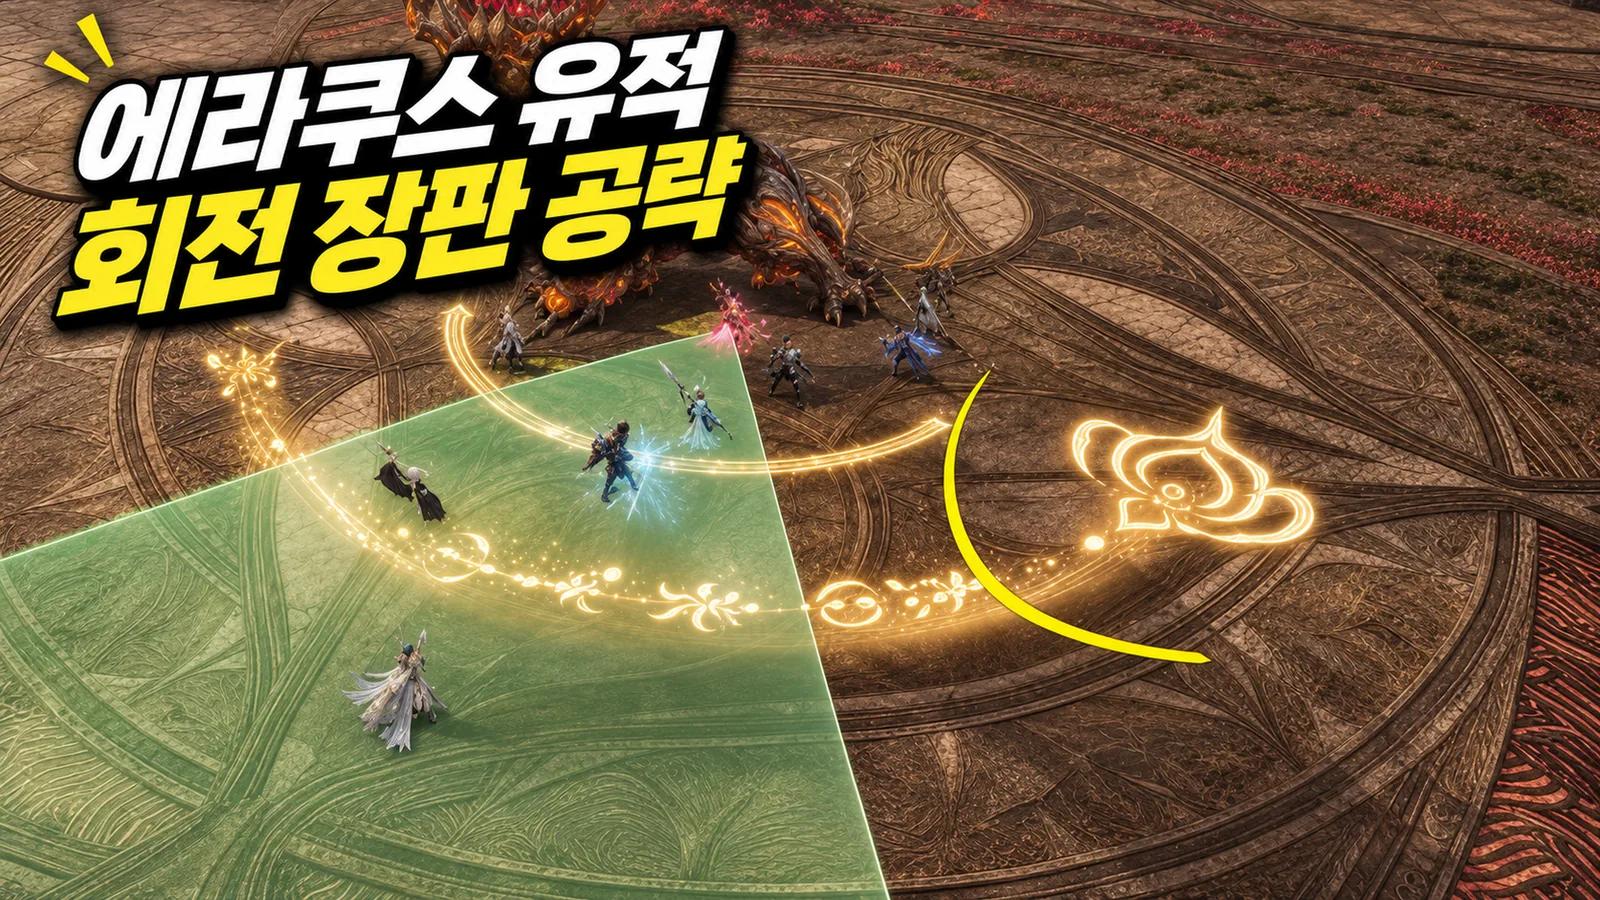
As the final boss loses health, the floor divides into wedges and the safe zone rotates. Prepare behind the boss initially, then follow the safe section marked with a flower-like pattern.
Avoid falling behind. Rotation speeds up as the mechanic continues, so maintaining the original pace can leave you in danger. Watch which direction the next safe wedge moves. Staying inside it takes priority over stopping for another attack.
At the end of the rotation, a broad ground slam follows. Jump the final shockwave to complete the sequence. It is easy to relax after avoiding the rotating areas, so remember rotation and final jump as one mechanic.
When the boss then moves to the 12 o'clock side, go behind it while preparing to leave immediately. Evade out before the large red area opens around it. Following behind and then disengaging are consecutive actions; the position you reach does not stay safe indefinitely.
Gold offering: break the chest, collect a coin, and press F
Later, the boss asks for gold. Attack and break an outer treasure chest to release a gold coin. Approaching it collects it automatically. Then use the F interaction in the circular offering area near the boss.
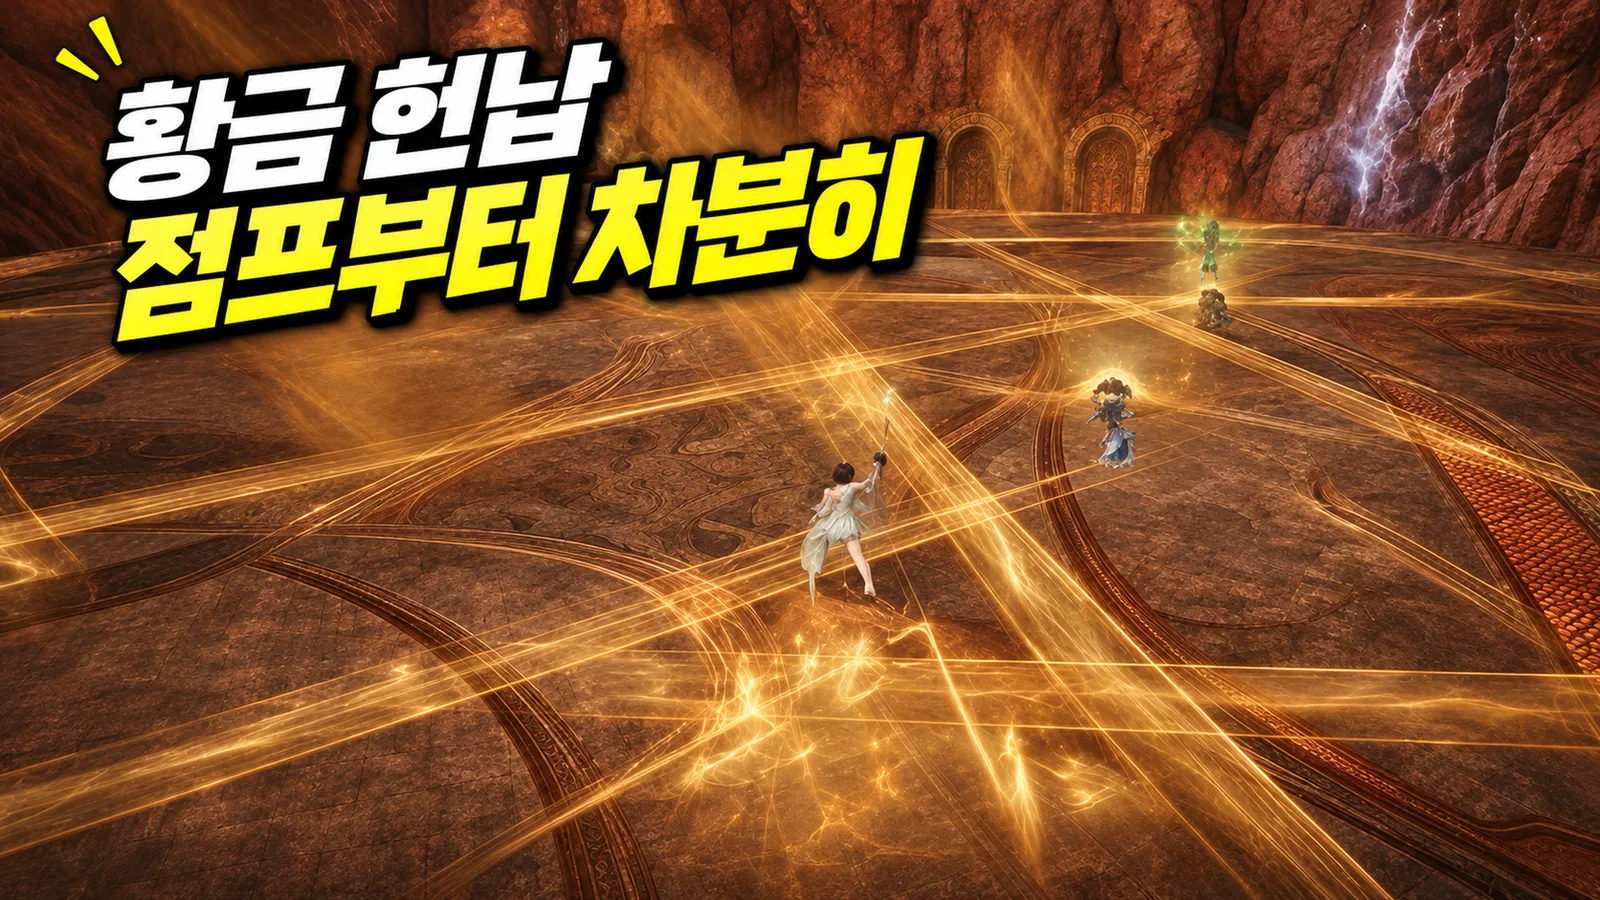
After collecting a coin, check your route before running straight at the boss. Jumpable shockwaves and stunning projectiles obstruct the approach. Getting stunned while rushing can prevent the interaction. Avoid attacks, reach the offering position, and then press F.
When explaining this mechanic, emphasize completing the offering rather than collecting the coin. Breaking the chest and collecting gold still leave the final interaction unfinished. A short party call such as “chest → coin → jump wave → F” keeps the actions connected.
Afterward, prepare for the return of rotating floors, the 12 o'clock move and disengage, and gold offering. Use the Stage 2 sequence to anticipate the next action, but prioritize actual boss motions and ground cues over moving solely at a health number.
Agree first on when to stop attacking. Wait beside the first boss's pit before entering, and focus on the final boss's last jump and offering route. Knowing both how long a location stays safe and when to leave turns lengthy mechanics into a shorter sequence of actions.
